EJSテンプレートエンジンの使い方メモ6 POST送信されたデータの処理
2016-03-23
こんにちは。さがっとです!
WEBアプリを作成できる。
を目標にnode.jsについて学習したことをメモしていきたいと思います。
2016/03学習分です。ペースあげないとアカン。。。
やりたい事
題名通りPOST送信されたデータの処理をします!
構成は以下の通り

■template.ejs:全体表示のテンプレート
■404.ejs:存在しないページにアクセスがあった時用のテンプレート
■index.ejs:”/”か、”/index”にアクセスがあった時用のテンプレート
■post.ejs:POSTでアクセスされた時用のテンプレート
全体表示のテンプレートを今までindex.ejsと名前をつけてたけど、分かりにくいのでリネーム・・。
各テンプレートファイル
まず、各テンプレートファイルを用意。
template.ejs(全体表示のテンプレート)
|
1 2 3 4 5 6 7 8 9 10 11 12 13 14 |
<!doctype html> <html> <head> <meta charset="utf-8"> <title><%=title %></title> </head> <body> <h1><%=title %></h1> <!--★ここに、他ejsテンプレートの中身を書き出す!--> <p><%-content %></p> </body> </html> |
★<%-content %>に各ejsの中身を書き出す。
index.ejs(”/”か、”/index”にアクセスがあった時用)
|
1 2 3 4 5 6 7 8 9 10 11 12 13 14 15 16 17 |
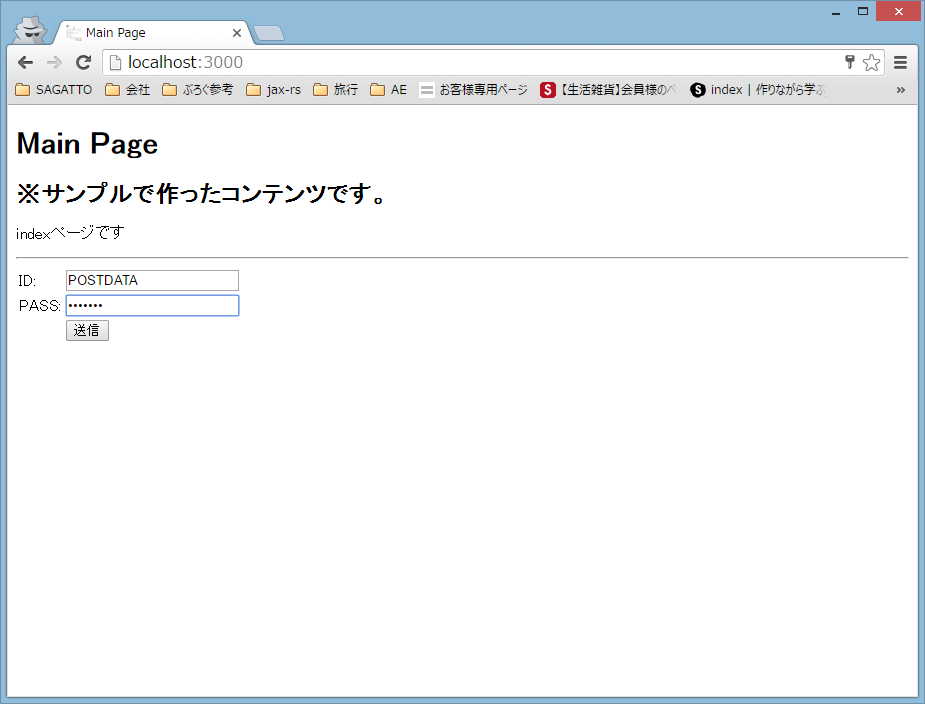
<h2>※サンプルで作ったコンテンツです。</h2> <p><%= message %></p> <hr> <form method="post" action="./post"> <table> <tr> <td>ID:</td> <td><input type="text" name="idname"></td> </tr> <tr> <td>PASS:</td><td><input type="password" name="pass"></td> </tr> <tr> <td></td><td><input type="submit"></td> </tr> </table> </form> |
topページにPOST用のフォームを作成しておく。
ログイン画面想定?なのでIDとパスワード入力のテキストBOXと送信ボタンを作成。
post.ejs(POSTでアクセスされた時用のテンプレート)
|
1 2 3 4 |
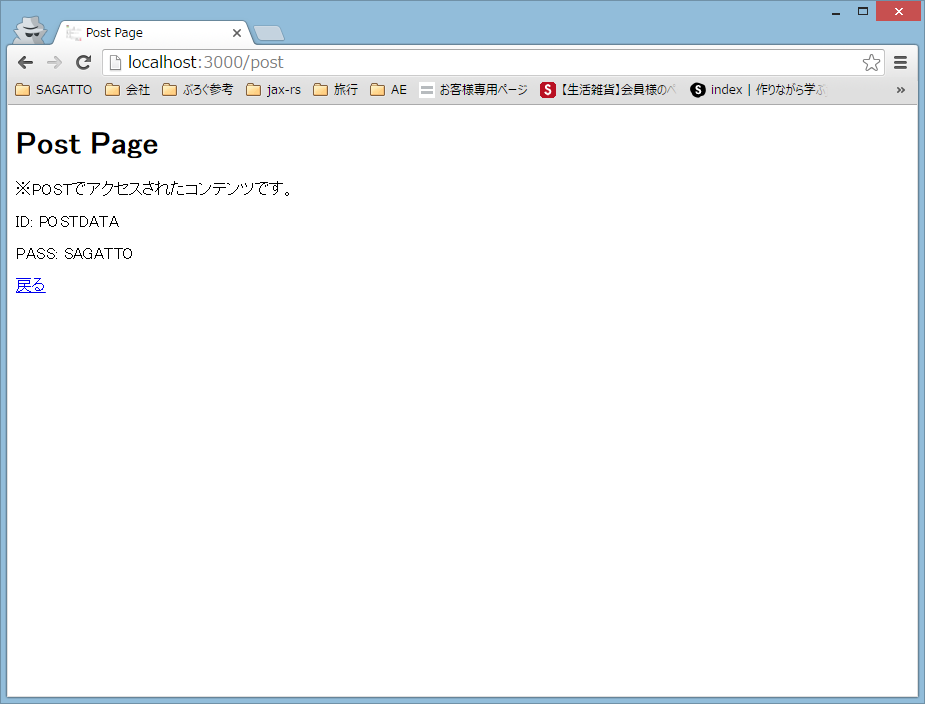
<p>※POSTでアクセスされたコンテンツです。</p> <p>ID: <%= idname %></p> <p>PASS: <%= pass %></p> <p><a href="/">戻る</a></p> |
POSTされたデータを表示する用のテンプレート。
受け取ったデータを<%= idname %>と<%= pass %>に表示します。
404.ejs(存在しないページにアクセスがあった時使用)
|
1 2 3 4 |
<p>※ページが見つからない時のコンテンツ。</p> <p><%= message %></p> <p> </p> <p><a href="/">戻る</a></p> |
スクリプトファイル
serverapp.js
|
1 2 3 4 5 6 7 8 9 10 11 12 13 14 15 16 17 18 19 20 21 22 23 24 25 26 27 28 29 30 31 32 33 34 35 36 37 38 39 40 41 42 43 44 45 46 47 48 49 50 51 52 53 54 55 56 57 58 59 60 61 62 63 64 65 66 67 68 69 70 71 72 73 74 75 76 77 78 79 80 81 82 83 84 85 86 87 88 89 90 91 92 93 94 95 96 97 98 99 100 101 102 103 104 105 106 107 108 109 110 111 112 113 114 115 116 117 118 119 120 |
var http = require('http');//httpモジュールをロード var fs = require('fs'); var ejs = require('ejs');//ejsオブジェクトの取得 var url = require('url');//urlオブジェクトの取得 //★1 querystringオブジェクトを取得 var qs = require('querystring'); //テンプレートファイルの読み込み(同期処理) var template = fs.readFileSync('./template.ejs', 'utf8'); var index = fs.readFileSync('./index.ejs', 'utf8'); var post = fs.readFileSync('./post.ejs', 'utf8'); var notfound = fs.readFileSync('./404.ejs', 'utf8'); //各ページのデータを準備 var pagedata = { "/":{ "title":"Main Page", "message":"indexページです", "content":index}, "/index":{ "title":"Main Page", "message":"indexページです", "content":index}, "/post":{ "title":"Post Page", "content":post}, "/notfound":{ "title":"404", "message":"ごめんなさい。ページが見つかりません。", "content":notfound}, }; //サーバー起動処理 var server = http.createServer();//Serverオブジェクトを作成 server.on('request', doRequest);//リクエストが来たらdoRequest関数を実行する server.listen(3000);//server待ち受け console.log('Server running!');//server起動ログ // リクエストの処理 function doRequest(req, res) { //★0「favicon.ico」のリクエスト処理 var host = req.headers.host var arrayOfStrings = host.split('.hostname.'); var path = 'image'; if (arrayOfStrings.length == 2){ path = path + '/' + arrayOfStrings[0]; } if(req.url == '/favicon.ico'){ //ファビコン var buf = fs.readFileSync( path + '/favicon.ico'); res.writeHead(200, {"Content-Type": "image/vnd.microsoft.icon"}); res.end(buf); return; } var urlinfo = url.parse(req.url);//リクエストされたURLをオブジェクトに格納 //★2 requestオブジェクトの「method」を取得 var methodinfo = req.method; //パスの値を取得し、表示するページデータを準備しておいたpagedataからゲットする var displaydata; if(pagedata[urlinfo.pathname] == null){//パス名と、pagedataのキーが一致しない場合 console.log("NOT FOUND PAGE:" + req.url); displaydata = pagedata["/notfound"]; }else{ displaydata = pagedata[urlinfo.pathname]; } var contentdata; //★3 取得したHTTPメソッドが「GET」の場合 if(methodinfo == "GET"){ console.log("getだよ!:" + req.url); contentdata = ejs.render(//ゲットしたページのレンダリング displaydata.content,{ message : displaydata.message, data : displaydata.data } ); //全体表示のテンプレート(template)内に、コンテンツ(contentdata)をはめこむ var templatedata = ejs.render(template, { title : displaydata.title, content: contentdata } ); res.writeHead(200, {'Content-Type': 'text/html'}); res.write(templatedata); res.end(); return; }else if(methodinfo == "POST"){//★4 取得したHTTPメソッドが「POST」の場合 //POSTで送られたデータを取得 console.log("postだよ!:" + req.url); var body=''; req.on('data', function (data) { body +=data; }); //POSTで送られたデータをパースし、オブジェクトにまとめます req.on('end',function(){ var postdata = qs.parse(body); contentdata = ejs.render(//ゲットしたページのレンダリング displaydata.content,{ idname: postdata.idname, pass : postdata.pass } ); //★5 全体表示のテンプレート(template)内に、コンテンツ(contentdata)をはめこむ var templatedata = ejs.render(template, { title : displaydata.title, content: contentdata } ); res.writeHead(200, {'Content-Type': 'text/html'}); res.write(templatedata); res.end(); }); } } |
な・・・、長い・・。
★1 querystringオブジェクトの取得
クエリー文字列を扱うため、「querystring」というオブジェクトを取得しておく。
これで、クエリー文字列から必要な値を適格に取り出せるようになる。
クエリ文字列:Webサーバに送信するデータをURLの末尾に特定の形式で表記したもの。
例) http://example.com/foo/post?name1=value1&name2=value2
「?」以降がクエリ文字列
URLの末尾に「?」マークを付け、続けて「名前=値」の形式で記述する。
値が複数あるときは「&」で区切る。
★0「favicon.ico」のリクエスト処理
node.jsを使ってて気づいたのですが、コンソールログを仕込むと何故か毎回2回リクエストが走ってる模様。
調べてみると、「favicon.ico」のリクエストがきているとのこと。
favicon.ico:Webブラウザのブックマーク(お気に入り)機能で表示される、そのWebサイトのアイコン画像。
リクエストのURLを見て分けてやらないとGET向けの処理が2回実行され、毎回「NOT FOUND PAGE」とログが流れてしまうので、とりあえず対処。imageフォルダに「favicon.ico」を用意しておくことを忘れずに!
時間あるときに詳しく調べてメモしよう。
★2 requestオブジェクトの「method」を取得
HTTPメソッドを見分けるにはrequestオブジェクトの「method」を取得すればOK。
★3 取得したHTTPメソッドが「GET」の場合
★2で取得したmethodinfoが”GET”だった場合は前回までと同じ処理を行う。
★4 取得したHTTPメソッドが「POST」の場合
POSTで送信されたデータを受信した際、「data」というイベントが発生するので、「data」に対しイベントハンドリングを行う。
このイベントハンドラは引数に送られてきたデータが渡されるので、変数bodyに格納しておく。
|
1 2 3 |
req.on('data', function (data) { body +=data; }); |
次に、「end」というイベントハンドラを用意し、すべての受信処理が完了した後の処理を記述する。
|
1 2 3 4 5 6 7 8 |
req.on('end',function(){ var postdata = qs.parse(body); contentdata = ejs.render(//ゲットしたページのレンダリング displaydata.content,{ idname: postdata.idname, pass : postdata.pass } ); |
ここでは、POSTデータのレンダリングを行っています。
レンダリング前のPOSTデータの整形はquerystringオブジェクトの「parse」メソッドで行なう。
「parse」メソッド:引数に渡されたクエリー文字列をパースし、オブジェクトにまとめる。
クエリ文字列が、name1=value1&name2=value2だった場合は、
|
1 |
{ name1: "value1", name2:"value2" } |
と整形される。
★5 全体表示のテンプレート(index)内に、コンテンツ(contentdata)をはめこむ
あとは前回まで同様、全体表示のテンプレート(index)内に、コンテンツ(contentdata)をはめこむ。
動かしてみる
コマンドプロンプトでスクリプトファイルを起動。
|
1 |
node serverapp.js |
http://localhost:3000へアクセス。適当にIDとパスワードを入れて「送信」ボタンをクリック


完璧!
そろそろ複雑になってきたので、次からはフレームワーク使います。
この記事がお役に立てたら、是非シェアをお願いします^^


