WordPressをVagrantへインストールする
CentOS6.4環境で仮想マシンを立ち上げる
Boxのダウンロード
URLは、http://www.vagrantbox.es/で入手。
|
1 |
vagrant box add centos64 http://developer.nrel.gov/downloads/vagrant-boxes/CentOS-6.4-x86_64-v20131103.box |
Boxが登録されていることを確認する
|
1 2 |
$ vagrant box list centos64 (virtualbox, 0) |
192.168.33.10でアクセスできるようVagrantfileを書き換える
|
1 2 3 4 |
vi Vagrantfile ---------------- ・・・略・・・ config.vm.network "private_network", ip: "192.168.33.10" ←この1行のコメントアウトをはずす |
設定を反映する
|
1 |
vagrant reload |
仮想マシンを立ち上げてログインする
|
1 2 3 |
vagrant init centos64 vagrant up vagrant ssh |
準備
rootになっておく
|
1 |
sudo su |
wgetをインストールする
|
1 |
yum install wget |
unzipをインストールする
|
1 |
yum install unzip |
80番ポートを追加する→HTTPポート(80番ポート)の開放
|
1 2 3 4 5 6 |
vi /etc/sysconfig/iptables --------------------- ・・・略・・・ -A INPUT -m state --state NEW -m tcp -p tcp --dport 22 -j ACCEPT -A INPUT -m state --state NEW -m tcp -p tcp --dport 80 -j ACCEPT ← 80番ポートを追加 ・・・略・・・ |
ファイアウォールの設定を反映する。
|
1 |
/etc/init.d/iptables restart |
Apacheのインストール・設定
Apacheをインストールする
|
1 |
yum install httpd |
httpd.confの修正
|
1 2 3 4 5 6 7 8 9 10 |
vi /etc/httpd/conf/httpd.conf ---------- ・・・略・・・ <VirtualHost *:80> ←VirtualHostを使用する # ServerAdmin webmaster@dummy-host.example.com # DocumentRoot /www/docs/dummy-host.example.com ServerName 192.168.10.33 ←ホスト名を192.168.10.33にする。 # ErrorLog logs/dummy-host.example.com-error_log # CustomLog logs/dummy-host.example.com-access_log common </VirtualHost> |
Apacheを起動する
|
1 |
service httpd start |
Apacheの動作確認
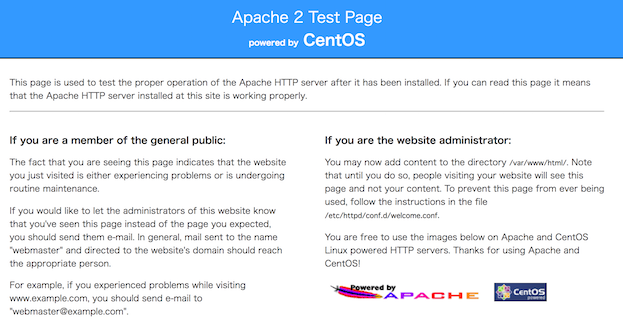
http://192.168.33.10/へアクセスする。
上記のようなテストページが表示されればOK
PHPをインストールする。
PHPからMySQLを操作できるよう、php-mysqlモジュールもインストールしておく
|
1 |
yum install php php-mysql |
タイムゾーンの設定
|
1 2 3 4 5 6 7 8 9 10 11 |
vi /etc/php.ini ------------ ・・・略・・・ ;;;;;;;;;;;;;;;;;;; ; Module Settings ; ;;;;;;;;;;;;;;;;;;; [Date] ; Defines the default timezone used by the date functions ; http://www.php.net/manual/en/datetime.configuration.php#ini.date.timezone date.timezone = "Asia/Tokyo" ←タイムゾーンの設定を追加 |
Apacheを再起動して設定を反映する
|
1 |
service httpd restart |
phpinfoの確認
|
1 2 3 4 5 6 |
vi /var/www/html/phpinfo.php ------- ・・・略 <?php phpinfo(); ?> |
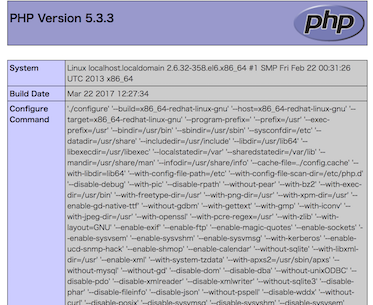
http://192.168.33.10/phpinfo.phpにアクセスする。
上記のようなページが表示されればOK
MySQLをインストールする。
|
1 |
yum install mysql-server |
インストールが完了したら MySQLを起動する
|
1 |
service mysqld start |
rootでのログイン確認
|
1 2 3 4 5 6 7 8 9 10 11 12 13 14 15 |
mysql -u root ------------- Welcome to the MySQL monitor. Commands end with ; or \g. Your MySQL connection id is 4 Server version: 5.1.73 Source distribution Copyright (c) 2000, 2013, Oracle and/or its affiliates. All rights reserved. Oracle is a registered trademark of Oracle Corporation and/or its affiliates. Other names may be trademarks of their respective owners. Type 'help;' or '\h' for help. Type '\c' to clear the current input statement. mysql> |
MySQLの自動起動設定
|
1 |
chkconfig mysqld on |
自動起動設定確認
|
1 2 3 |
chkconfig | grep mysqld --------- mysqld 0:off 1:off 2:on 3:on 4:on 5:on 6:off |
3がonになっていればOK
※MySQLのrootパスワード設定が必要な場合はやっておく。
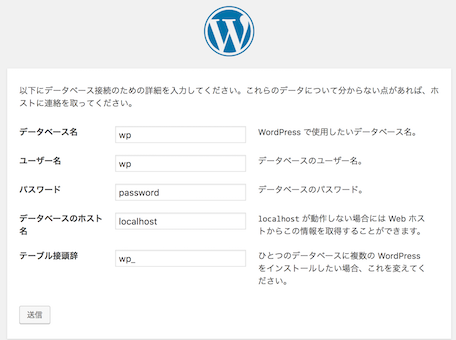
MySQLにWordPress用のデータベース(wp)とユーザー(wp)を作成する。
|
1 2 3 4 |
mysql -u root mysql> create database wp; mysql> grant all privileges on wp.* to wp@localhost identified by 'wp用の任意パスワード'; |
WordPressをインストールする。
以下サイトからWordPressをダウンロードする
|
1 2 3 |
cd /usr/local/src weget https://ja.wordpress.org/wordpress-4.7.5-ja.zip unzip wordpress-4.7.5-ja.zip |
Apacheで扱えるディレクトリに配置
|
1 |
cp -r wordpress /var/www/ |
|
1 |
chown -R apache:apache /var/www/wordpress |
Apacheの設定
|
1 2 3 4 5 6 7 8 9 10 11 12 |
vi /etc/httpd/conf/httpd.conf ・・・略・・・ <VirtualHost *:80> # ServerAdmin webmaster@dummy-host.example.com DocumentRoot "/var/www/wordpress" ← DocumentRootを追加 ServerName 192.168.10.33 # ErrorLog logs/dummy-host.example.com-error_log # CustomLog logs/dummy-host.example.com-access_log common <Directory "/var/www/wordpress"> ← DocumentRootと同じディレクトリに指定 AllowOverride None ←.htaccessによるディレクティブの上書きを許可 </Directory> </VirtualHost> |
Apacheを再起動して設定を反映する
|
1 |
service httpd restart |
http://192.168.33.10/へアクセスする
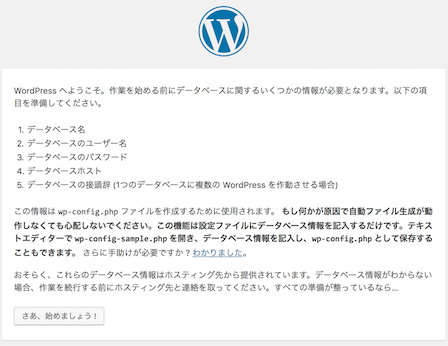
上記のページが表示されればOK
WordPressの設定
「さあ、始めましょう」ボタンをクリックし、MySQLの設定を入力し、「送信」
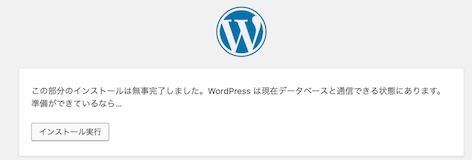
インストール実行
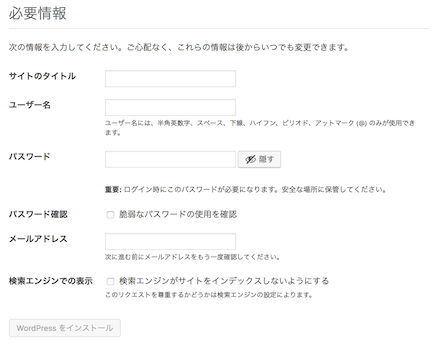
必要事項を入力してインストール
http://192.168.33.10/wp-admin/にアクセスする
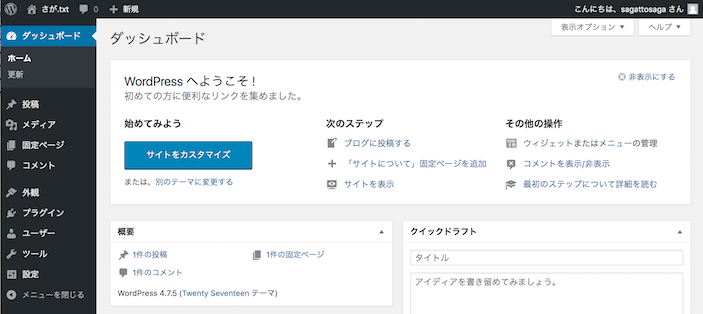
ログインし、WordPressの管理画面に入れれば、OK
この記事がお役に立てたら、是非シェアをお願いします^^